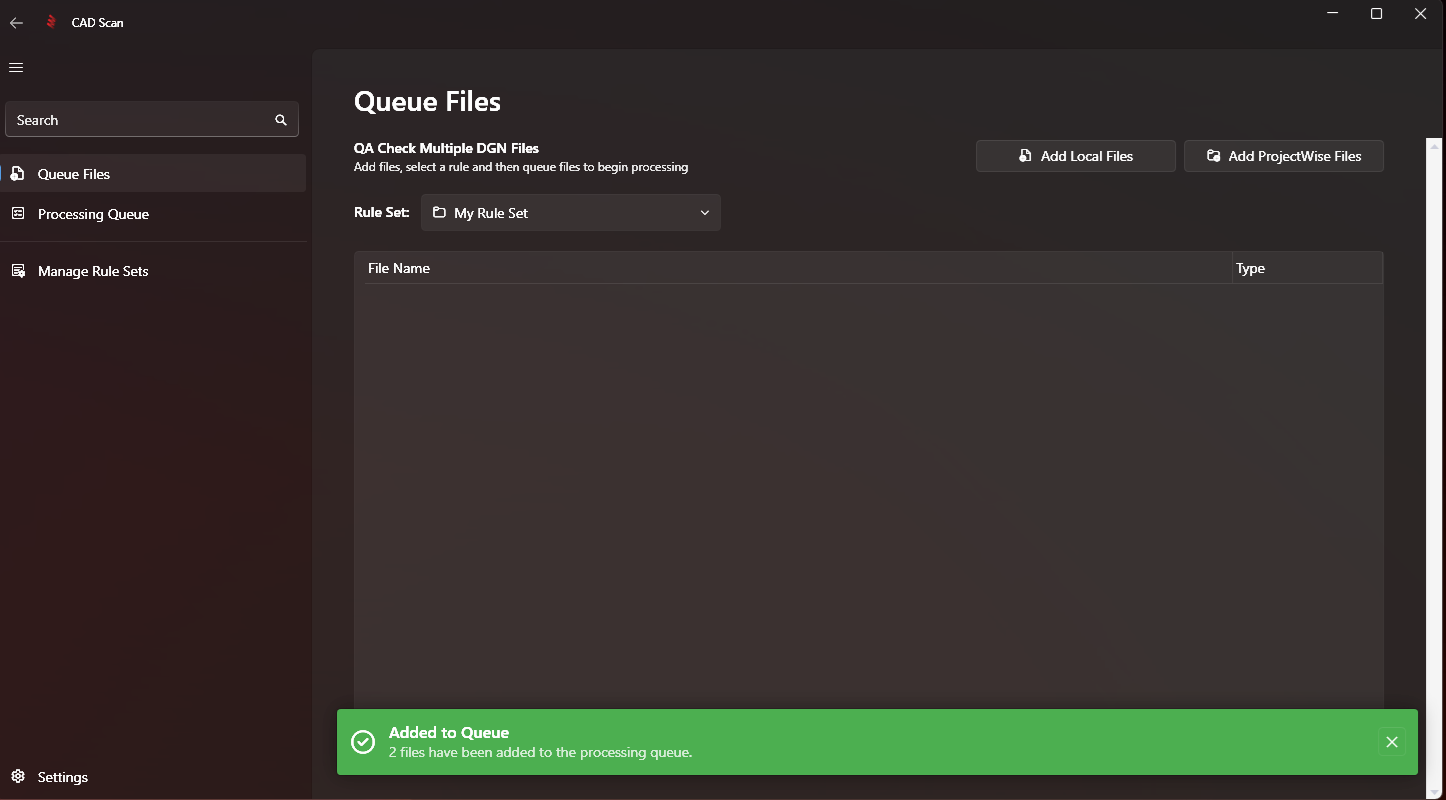
Queuing Files for Checking
Queuing Files for Checking
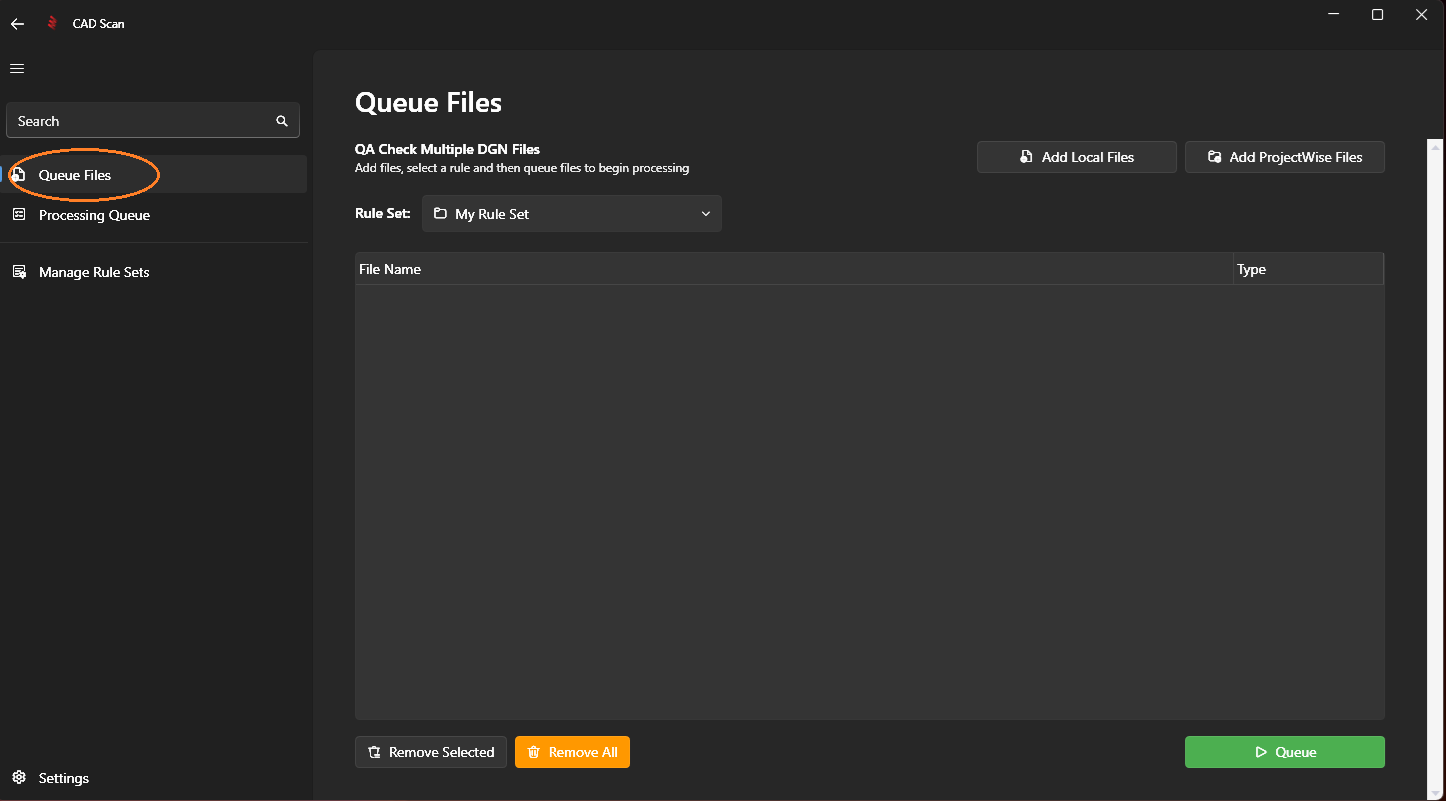
Step 1: Navigate to Queue Files
Click on 'Queue Files' in the left navigation menu
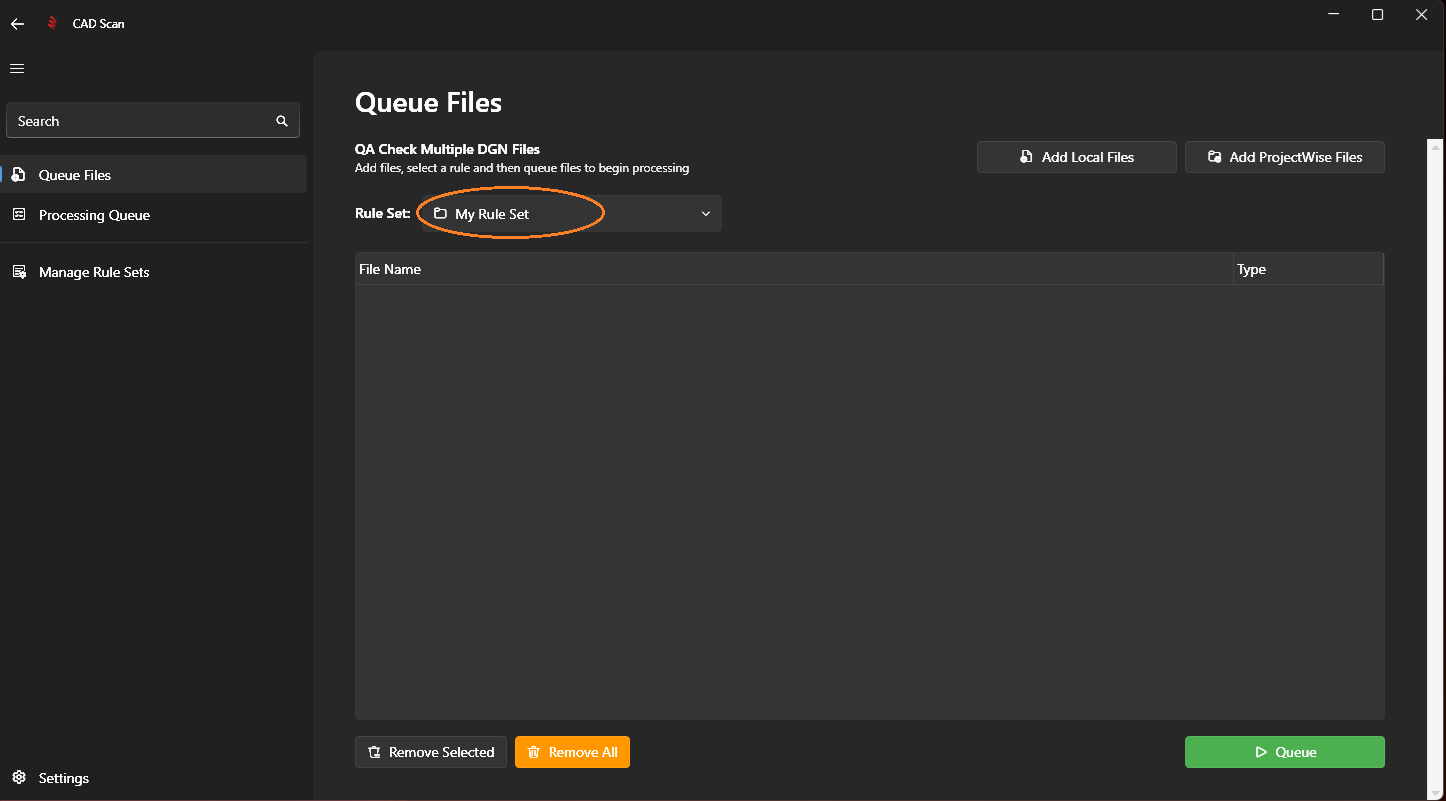
Step 2: Choose a Rule Set
In the drop down menu choose the Rule Set you want to use to check files against.
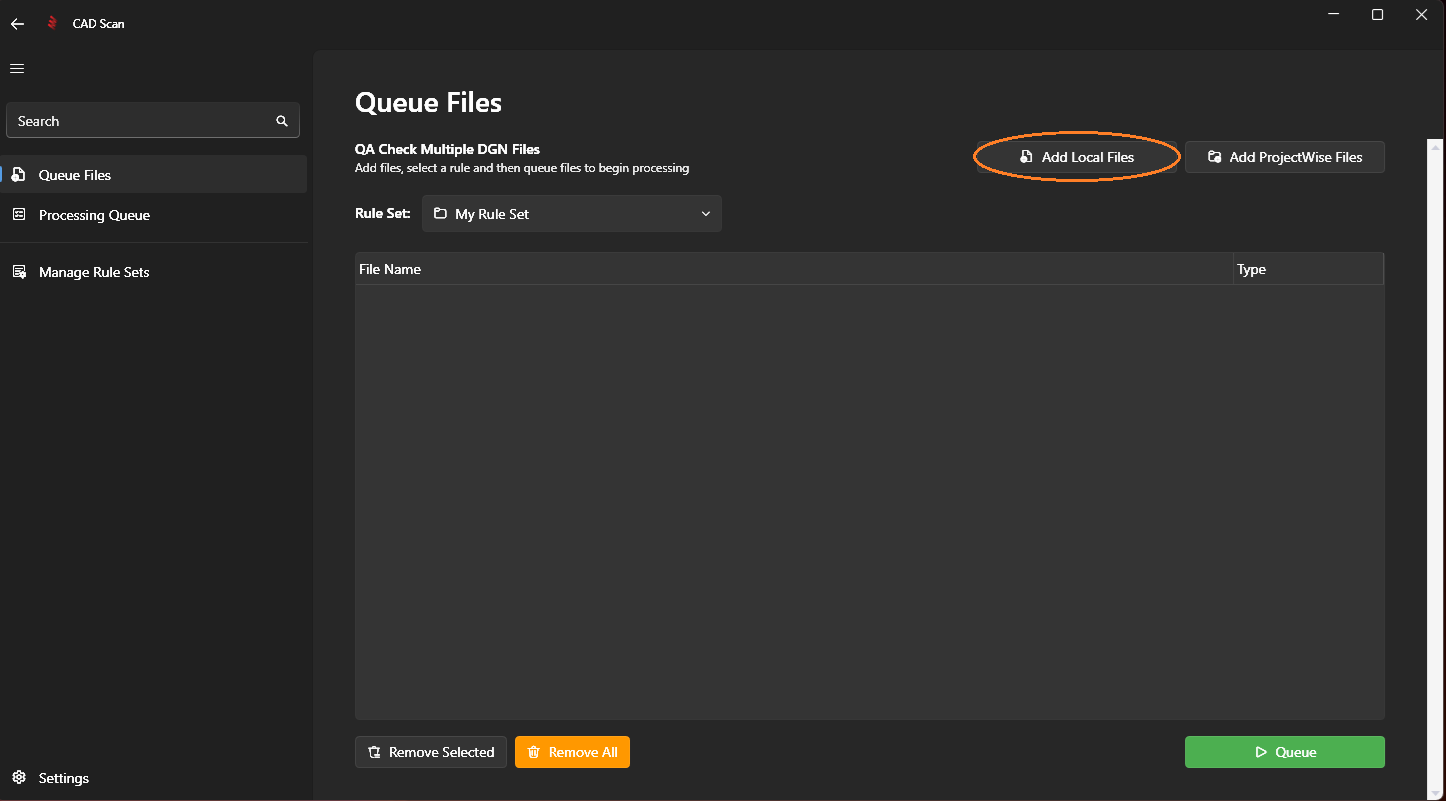
Step 3: Add Files
Choose Local files or Projectwise files, or a combination of both by clicking on the 'Add Local Files' and/or 'Add ProjectWise Files' buttons.
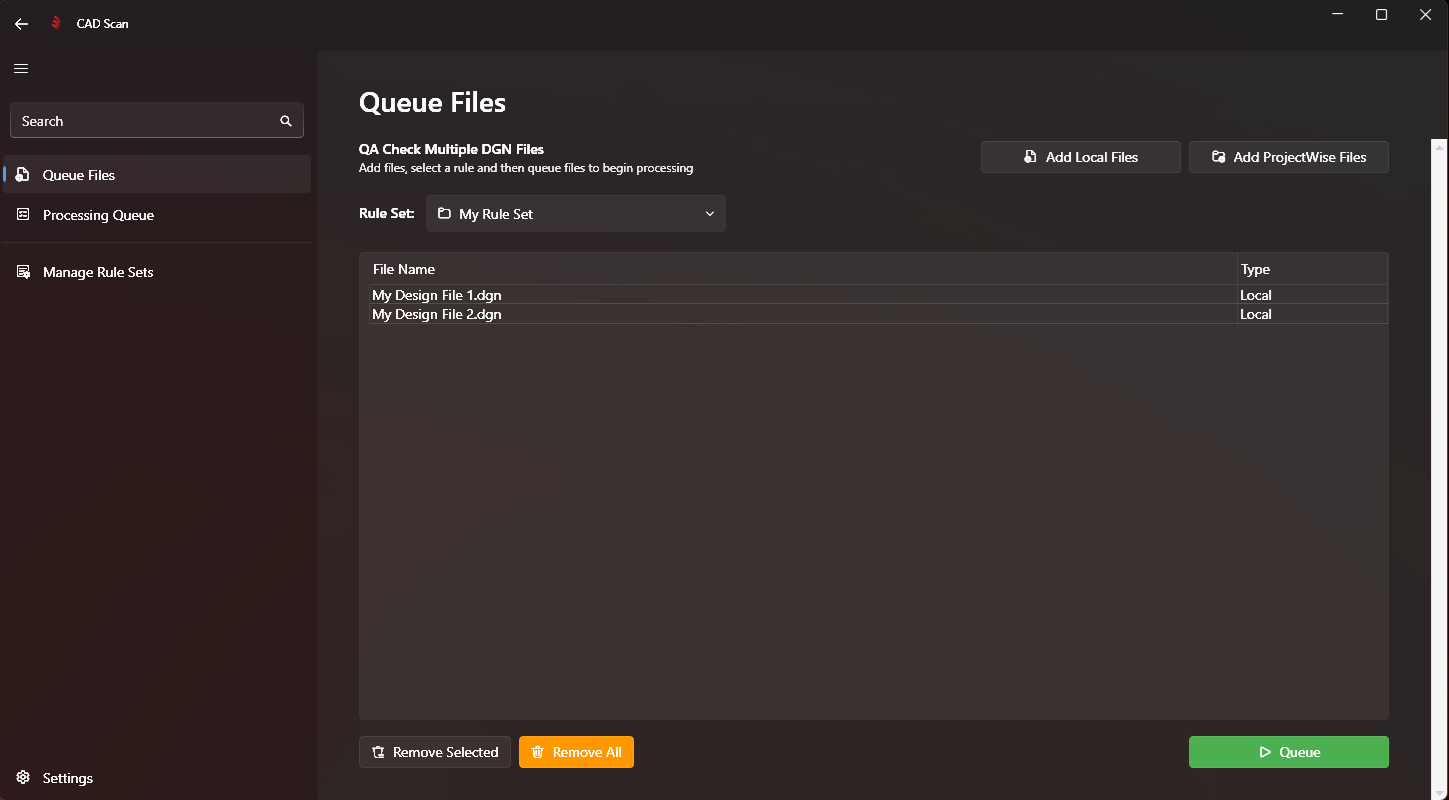
Step 4: Queue Files
Once you've added all the files you want to check, click on the 'Queue' button to add the files to the processing queue. The system will commence checking your files in the background. You can use the 'Remove Selected' or 'Remove All' button to remove files as you please.
A green pop-up will be displayed showing that files were successfully added to the processing queue.
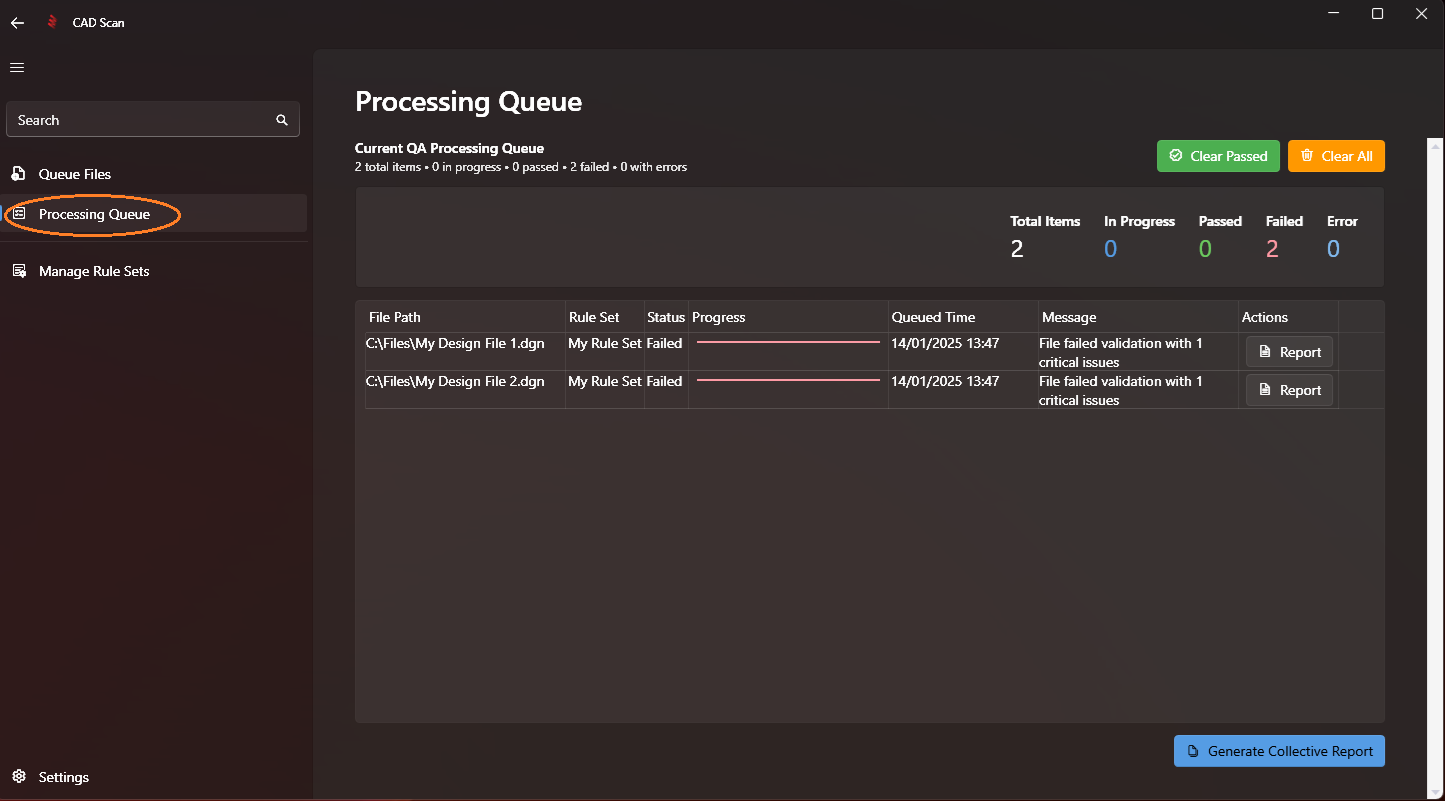
Step 5: Open Processing Queue
Open the Processing Queue by clicking the 'Processing Queue' button in the left navigation menu. Here you can see the results of your checked files.
Note
Next Step: Generating a Single File Report or Generating a Collective Report